Saturday, February 19, 2011

Dulce De Leche Cookies

What a satisfying endeavor, baking cookies, and I seem to be doing a lot of that lately.  There is usually nothing to complicated about the process and the end results are so delicious.  A wonderful side effect is that the whole house smells great as the cookies bake. 
I have seen the recipe for these cookies on a few websites and they sounded so marvelous I had to try them.  I'm a sucker for anything that tastes of butterscotch or caramel and for those who don't know this product, dulce de leche is basically a caramelized condensed milk.  It is easily found in the Hispanic section of any grocery store in the town in which I live.  I also know that there are recipes on the Internet for making your own, but it takes hours and the thought of putting a unopened can of condensed milk in my oven to bake for a few hours is, quite frankly, a scary thought.  My oven is dirty enough without an exploded can of sticky sweet milk burning away!
These are meant to be a sandwich type cookie, but after trying one in that form, I found them to be just too rich so I opted to go with just a nice, thin single cookie.  They're great and will be added to my cookie repitoire.

Dulce De Leche Cookies

2 1/2 cups all-purpose flour
1 teaspoon baking soda
1/4 teaspoon salt
2 sticks unsalted butter, at room temperature
3/4 cup store-bought dulce de leche, plus more for filling
3/4 cup packed light brown sugar
1/2 cup sugar
2 large eggs

Preheat oven to 350 degrees F and position a rack in the upper third of the oven. Line two baking sheets with parchment paper and set aside.

In a medium bowl, whisk together

In the bowl of a stand mixer fit with a paddle attachment, beat the butter at medium speed until just softened and broken up a bit. Add the 3/4 cup dulce de leche, brown sugar and granulated sugar. Beat on medium speed until light and fluffy, about 3 minutes. Add the eggs one at a time, beating to incorporate.  Add the flour, baking soda and salt.  Reduce the mixer speed to low and mix only until the flour is just incorporated. You may need to finish off the mixing with a big spatula.

Spoon the dough onto the lined baking sheets using a heaping teaspoon of dough for each cookie. The dough will be soft. Leave 2 inches of space between each cookie for the baking spread.

Bake the cookies for 10 to 12 minutes. The cookies will be honey brown with a light crust, but still very soft when they come out of the oven. Let them rest on the cookie sheet for a minute or two before removing to cool.
Once the cookies are cooled completely, spread them with dulce de leche and sprinkle with a bit of sea salt if you like. Keep well wrapped for up to four days.

Saturday, February 12, 2011

Fairy Gingerbread

Isn't that a marvelous name for a cookie?  And these are marvelous cookies, indeed. Light as air yet they have a most potent double whammy punch of ginger flavor. They use fresh, grated ginger as well as lightly toasting ground, dried ginger.  When you take a bite, they literally melt in your mouth and then you can feel the warmth of the ginger spreading.  They are quite remarkable and quite addictive.  You've been forewarned!
This recipe came from the Cook's Illustrated folks other great cooking publication and show called Cook's Country. It takes rather old fashioned recipes they find from old cookbooks and other sources and modernize them for today's kitchens and cooks.  I am never disappointed with their recipes and this one will be a keeper.

Fairy Gingerbread

1 1/2 teaspoons ground ginger
3/4 cup plus 2 tablespoons all purpose flour
1/2 teaspoon baking soda
1/4 teaspoon salt
5 tablespoons unsalted butter, softened
9 tablespoons packed light brown sugar
4 teaspoons grated fresh ginger  (Using a rasp grater works very well)
3/4 teaspoon vanilla extract
1/4 cup whole milk, room temperature

1. Preheat the oven to 325 degrees and prepare your cookie sheets. Spray the cookie sheets with cooking spray and cover with a sheet of parchment paper.
2. Heat the ground ginger in a small skillet over medium heat until fragrant, about 1 minute.
3. Combine the flour, toasted ginger, baking soda, and salt in a bowl.

4. Using a stand mixer beat butter and brown sugar until light and fluffy, on medium-high speed.
5. Add fresh ginger and vanilla and mix until incorporated, about 30 seconds.

6. Reduce speed to low and add flour mixture in 3 parts, alternating with 2 additions of milk.
7. You are now ready to spread the batter evenly on the 2 prepared cookie sheets. Each sheet should have about 3/4 cup of batter. Do not fret if it looks like there is not a lot of batter on the sheet. These cookies should be really thin.

8. Bake until a deep golden brown, about 16 - 20 minutes, switching and rotating sheets halfway through baking. I baked it 16 minutes, but that felt a bit too long. Assess halfway through and determine how much more time you will need.

9. Once completely baked, take the cookie sheets out and score immediately using a chef's knife or a pizza cutter.
10. Once the cookies are cool, about 20 minutes, you can remove the cookies from the parchment. Go over scoring lines with the dull side of a paring knife and they should separate perfectly. Enjoy!

Sunday, February 6, 2011

Super Bowl Sandwich

Apparently there is some sort of big game on today.  I swear I didn't even know which teams were playing until this morning as I watched Sunday Morning on CBS.  I thought the Dallas Cowboys were playing because I kept hearing the Dallas Stadium was covered in snow (as is practically the whole USA).

Well, I'm not going to be called a party pooper and I decided to get into the spirit of the day and make a manwich, even though the chances of The Husband watching the entire game is slim to none.  He is known to sit through baseball game after baseball game and when his alum team, the Oregon State Beavers are playing football he will pay attention.  Thankfully though, his interest in pro football is near zero. 

We will most likely tune in for halftime entertainment, which again I learned, thanks to Sunday Morning on CBS, will be the Black Eyed Peas.  While watching these said Peas, we will eat our manwiches and pretend we care, like all good Americans do because afterall, isn't the Superbowl a truly American tradition?

My sandwich is made with the most delicious coldcuts out there, from Boar's Head, a 100 year old company out of New York City.  I first tried them while living in Seattle and use to buy it at the Pike Place Market at a wonderful Italian food shop called DeLaurenti's. Check it out next time you're in Seattle. Our local grocery store, Roth's, fortunately now carries these products.

I used an Italian bread, sprinkled olive oil and red wine vinegar over, spread on some olive tapenade, then layered mortadella, black forest ham, provolone, genoa salami and cheddar cheese.  Served with some chips, a slice of pickle, and a cold beer and we're ready for the game!

Saturday, January 29, 2011

Carmelized Onion Goat Cheese Tart

Every now and then I open up the freezer and decide what can stay and what most go. I do this mostly so I can close the freezer door.  Where does it all come from?  Anyway, I found a sheet of puff pastry left over from the holidays and knew it must be used.  One cannot let a piece of delicious puff pastry go to waste.

As I had just finished watching the wonderful movie, Julie and Julia, I was in the mood to cook something French and chose to make a sort of French tart with caramelized onions and goat cheese.  This is a extremely simple dish to put together and the results are superb.
Caramelized Onion Goat Cheese Tart

3 ounces goat cheese, crumbled into small pieces
1 sheet of puff pastry, thawed at room temperature
1 large onion, cut into thin slices
1/4 cup Parmesan Cheese
Salt and Pepper to taste
Olive oil
1 egg beaten with a Tbsp of water or milk

Preheat oven to 425 degrees.  Roll out puff pastry until it's approximately 14 inches long and 8 inches wide.  Put on ungreased baking sheet.  With a pastry brush, paint around the edges of the pastry and then fold the edges over approximately 1/2 inch.  Put baking sheet in refrigerator while cooking onions.
Put approximately 1 Tbsp. of olive oil in a heavy saute pan and heat.  Cut onion into thin slices. Put in saute pan and cook, stirring frequently until they are a dark golden brown. Season with salt and pepper.  Let cool slightly. 
Distribute onions over cold puff pastry.  Top with crumbled goat cheese then Parmesan cheese.  Drizzle entire thing with some olive oil.  Brush edges with egg wash.   Bake for 15 to 20 minutes until puffed and golden brown.

Sunday, January 23, 2011

Cookies and Milk

Here is my idea of a perfect weekend day.  Me puttering in the kitchen, concocting something yummy for dinner, listening to NPR on the kitchen radio, The Husband in the TV room blissfully channel surfing (blissful because I'm not in there wanting to take control of the remote!), and the rest of the world is outside of our home leaving us alone.  Call me anti-social if you will, but I'm not really.  We just work very hard all week and relaxation in the variety of forms it takes in our house is much deserved.

Some weekends I go all out and whip up something fanciful and new to try, but this weekend the best I could come up with, at the request of The Husband, was peanut butter cookies.  He wanted nothing fancy, just the honest-to-goodness, peanut butter cookie like Mom use to make. 

I remember the first time I made peanut butter cookies when I was a teen, I found a recipe in this large book called the Whole Earth Catalog.  It was some kind of "hippie" catalog and what it was doing in our house and who brought it in is a mystery to me.  But anyway, they were delicious.  Alas, I was unable to find that recipe on the Internet so I went to one of my tried and true basic cookbooks, The Joy of Cooking, and found a wonderful substitute.  Served with a glass of milk, these cookies will surely remind you of your childhood.

Peanut Butter Cookies

1/2 cup brown sugar
1/2 cup granulated sugar
1/2 cup butter, softened
1 egg
1 cup creamy peanut butter
1/2 tsp salt
1/2 tsp baking soda
1 1/2 cups all purpose flour
1/2 tsp vanilla

Preheat oven to 375 degrees.  Line baking sheets with parchment paper.

Beat butter until soft.  Add sugars and beat until creamy.  Add egg, vanilla and peanut butter. Beat until creamy.  Add salt, baking soda and flour and beat until combined. 

Roll the dough into small balls. Place then on cookie sheet. Dip the tines of a fork into granulated sugar and press cookie balls flat making cross hatches.  Bake 12-14 minutes until golden brown.  Remove from cookie sheets onto cooling racks.

Monday, January 17, 2011

A Cup of Goodness

My last post was about the cold, wet weather and here is a cup of goodness to warm you up from head to toe.  This is a very tasty recipe and the good thing is you can sweeten it to your liking. I love Chai but find it is often too sweet when I purchase it a coffee shops. Enjoy!  

Masala Chai

Makes 2 cups

1/2 cup of water
1/1/2 cups of whole milk
1 star anise
1 1/2 heaping spoonfuls of loose leaf black tea, such as Darjeeling (or 2 tea bags)
1 small 1/2 inch of ginger, peeled
5 green cardamom pods
2 whole cloves
1/2 cinnamon stick
3 tsps of sugar or to taste

Lightly crush the cardamom pods so the seeds are exposed. Place the star anise, cardomom pods, ginger, cloves and cinnamon in a small pot and cover with 1/2 cup of water and bring to a gentle boil. Boil for around 10 minutes, then add the milk and tea.

Keep on a low heat so that the milk is scalding (make sure it doesn’t boil). Steep the tea for about 10 minutes. Add a couple spoonfuls of sugar. Pour through a strainer into cups and enjoy!

Friday, January 14, 2011

Sunny Skies Ahead

It's rainy, windy, cold and grey in Western Oregon.  I am hopeful for Spring, which is just around the corner now that we have gotten through the Christmas holidays.  I share with you some springtime sunshine coming through the windows at my father-in-law's in Astoria, Oregon and a wonderful bluebird house awaiting some new residents.

Saturday, January 8, 2011

Perfect White Bread

I know, I know.  We're suppose to eat whole grains and stay away from white bread but sometimes don't you just want a wonderful slice of homemade white bread?  Well, I know I do so Sunday seemed the day to dig for a recipe and give it a try.  What a delicious dinner of split pea soup and bread we had.

At some point in my culinary experiences I have made a loaf sandwich bread but it has been a very long time.  I went to my tried and true McCall's Cookbook and found just the recipe called McCall's Basic White Bread.  The ingredients were simple and on hand and instead of making two loaves as the recipe stated, I cut it in half and came up with a delicious single loaf and those are the measurements I will share with you.

As it was in the oven, the house began to smell like a wonderful bakery. When I took it out of the oven The Husband happened to come through the kitchen and exclaimed "Wow, get the camera."  He is well trained and knows that pretty much anything cooked in our home must get an obligatory glamour shot taken prior to consumption, whether I have decided to blog about it or not.  See ladies, husbands are trainable given the right positive reinforcement like fresh from the oven bread!

McCall's Basic White Bread

1 pk Yeast; active, dry
1/4 cup Water; warm (110-115 degs)
2 tsp Sugar
1 cup  Milk
3 tsp Salt
3 tbsp Butter
3 3/4 cup All-purpose flour
1. In a small bowl mix the yeast and the 1/4 cup warm water; add the sugar, stir well, and set aside until proofed. It is proofed when fermentation is apparent: the mixture will swell and small bubbles appear on the surface. (If it doesn't proof at all, it means the yeast is not fresh.)

2. In a small saucepan heat the milk with the salt and stir in the butter until it melts. Set aside to cool until it is no warmer than the yeast mixture.

3. Put 2 cups of the flour in a large mixing bowl and stir in the milk mixture. Beat well with a wooden spatula, add the yeast mixture, and continue beating the dough until it is smooth, adding an additional cup of flour to make a firm dough.

4. Turn the dough out onto a floured work surface and begin the kneading process, which evenly distributes the fermenting yeast cells through the dough.
5. There are several kneading methods, but the basic one is to flour the dough and your hand lightly, then push the heel of your hand down into the dough and away from you. Fold the dough over, give it a quarter turn, and push down again. Repeat pushing, folding and turning until the motion becomes rhythmic.

6. Knead for about 10 minutes, kneading in additional flour as necessary, until the dough is smooth and no longer sticky, and blisters form on the surface.

7. To test whether the dough has been kneaded enough make an indention in it with your fingers; it should spring back. If blisters form on the surface of the dough and break, this is another sign that the kneading is sufficient.

Note: If you have a heavy-duty electric mixer with a dough-hook attachment, knead the dough with the hook and finish it off on the board.  This is what I did and it saves lots of energy.

8. Butter a large bowl, transfer the dough to it, and turn the bowl until the dough is well coated with butter on all sides. Cover the dough with a dish towel and let it rise in a warm, draft-free place for 1 to 1-1/2 hours, until it is doubled in bulk. A good, warm, draft-free place is inside your room temperature oven.

9. To test further if the dough has risen properly, make an indentation in it with two fingers: if the dough does not spring back, then it is ready.
10. Butter a 9x5x3 inch loaf pan, or two pans that are about 8x4x2 inches. Punch the dough down with your fist to deflate it; transfer it to a floured board and knead it well for about 3 minutes. Pat it into a smooth round or oval shape and let it rest for 4 to 5 minutes.

11. Then form into 1 large or two small loaves, by shaping the dough into an oval the length of your bread pan, then gently stretching, rounding, and plumping it in the palms of your hands, tucking the edges underneath and pinching them together.

12. Lift carefully; drop the dough into the pan or pans and smooth out. Cover the dough with a towel and let it rise again in a warm draft-free place for about 45 minutes to 1 hour, until it is double in bulk.

13. Preheat the oven to 400F. Brush melted butter over the top of the dough.

14. Bake in the center of the oven for 20 minutes; reduce the heat to 350F and bake for 20 to 25 minutes longer, until the crust is well browned and the bread sounds hollow when removed from the pan and tapped on the bottom with the knuckles.
15. If you like a crusty loaf, remove it from the pan about 5 to 10 minutes before the end of the baking time and let it finish baking on the oven rack. It will get brown and crusty all over.

16. Remove the bread from the oven and let it cool on a rack before slicing.
The bread may be stored in a plastic bag in the refrigerator after it has cooled. If you seal it in a bag before it is completely cooled, the crust will become soft. Stored bread will keep about 1 week. It also freezes well if wrapped tightly in plastic wrap and sealed in a plastic bag and can be kept for up to 3 months.

Sunday, January 2, 2011

Hey Baby!

The Husband and I often go to a wonderful breakfast institution in our town called The Original Pancake House.  They're not fooling us though. We know they are not the "Original" by any means, though they have very good food.  One of their specialties is the Dutch Baby which comes to the recipients tables all puffy and golden and delicious looking.

We have never ordered one and recently I decided to give making one at home a try.  One word: Spectacular!  This is so easy to whip together, especially if you are use to making popovers or Yorkshire pudding.  The batter is very similar as is the cooking technique.  Make sure to use the correct size pan and the secret is to preheat that pan for 10 minutes in a very hot oven.  I used my trusty, well seasoned cast iron skillet and I delivered a perfect Dutch Baby to the breakfast table.  A dusting of powdered sugar and a sprinkling of fresh lemon juice is all you need to accompany this tasty treat.

P.S. Congratulations to my beautiful niece and her husband on the birth of their new baby girl!!

Dutch Baby

2 tablespoons vegetable oil
1 cup all-purpose flour
1/4 cup cornstarch
2 teaspoons grated zest and 2 tablespoons juice from 1 lemon
1 teaspoon salt
3 large eggs
1 1/4 cups skim milk (per recipe, makes for a crisper end product using skim milk)
1 tablespoon unsalted butter , melted and cooled
1 teaspoon vanilla extract
3 tablespoons confectioners' sugar
Adjust oven rack to middle position and heat oven to 450 degrees. Brush surface and sides of large skillet with oil. Place skillet on oven rack and heat until oil is shimmering, about 10 minutes.
Meanwhile, combine flour, cornstarch, lemon zest, and salt in large bowl. Whisk eggs in another bowl until frothy and light, about 1 minute. Whisk milk, butter, and vanilla into eggs until incorporated. Whisk one-third of milk mixture into flour mixture until no lumps remain, then slowly whisk in remaining milk mixture until smooth.

Carefully pour batter into heated skillet and bake until edges of Dutch Baby are deep golden brown and crisp, about 20 minutes. Transfer skillet to wire rack and sprinkle Dutch Baby with lemon juice and confectioners’ sugar. Cut into wedges. Serve.

Sunday, December 26, 2010

Homemade Granola Bars

I will never buy granola bars again now that I have discovered how very tasty and easy they are to make at home.  I like to put a morning snack in my purse for those times when I am about to go sit in a two hour meeting at work and my stomach is grumbling for lunch. There is nothing more embarrassing than stomach growls in a quiet meeting. OK, I guess there could be some things more embarrassing!

I found this recipe while browsing through one of my cookbooks called A Taste of Oregon which was gift, I believe from my best friend in the early '80s.  It was published by the Junior League of Eugene. It is chock full of wonderful recipes, many using local ingredients easily found in Oregon such as seafood and fresh vegetables.

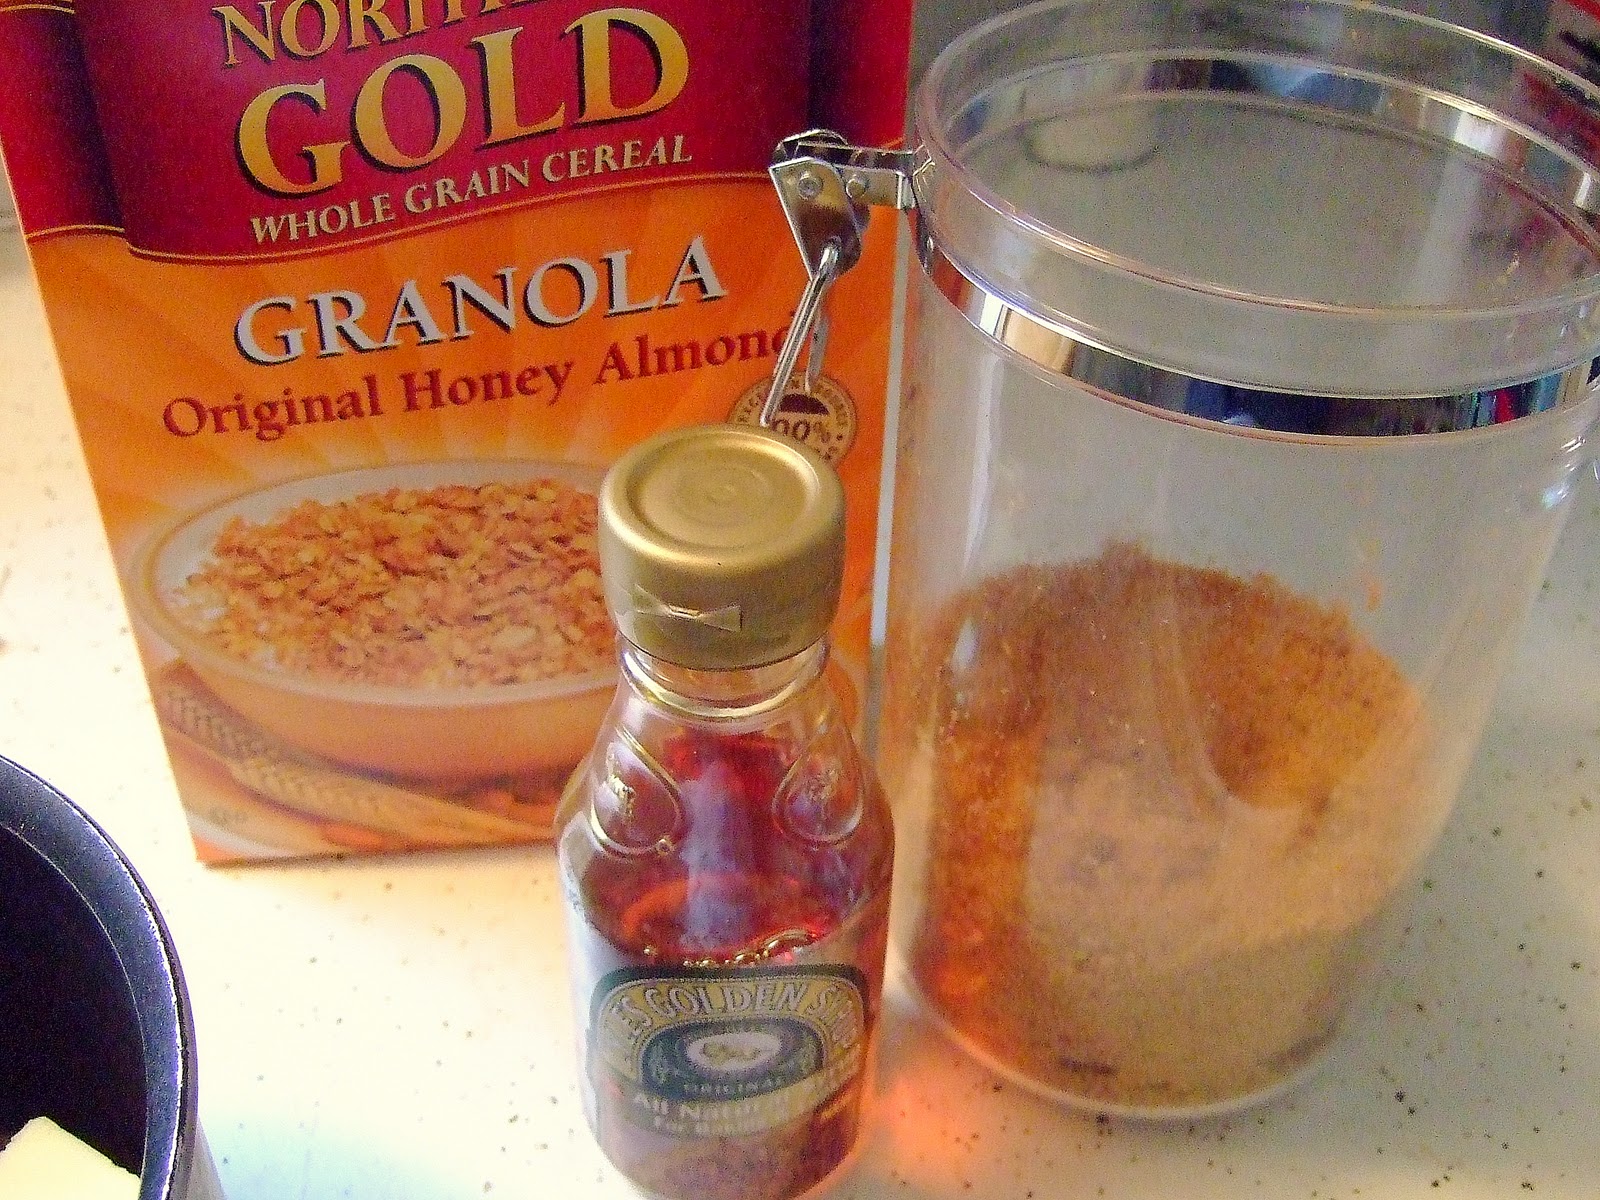
This is one of those very adaptable recipes where the extra additions can be anything that suits you.  I chose to add chopped pecans, shredded coconut and dried cranberries.  It was a wonderful combination of ingredients.  The other variation I made was to use treacle, an English golden syrup, instead of the honey.  It adds a light molasses taste which is just delicious. 

This will be a recipe I will make again and again.
Granola Bars

3/4 cups butter
1/2 cup brown sugar
1/2 cup honey
1 tsp vanilla
1/2 tsp salt
4 1/2 cups granola cereal
2/3 cups chopped nuts, coconut, dried fruit, seeds

In a 3 quart pan melt butter, then add brown sugar, honey, vanilla and salt;  stir until blended.  Stir in granola and extra goodies of your choice.  Pour into a well greased 10 x 15 inch pan.  With your hands, press in firmly to form an even layer.  Bake uncovered in a 400 degree oven until browned and bubbly, about 10-15 minutes.  Watch carefully because these get dark quickly.  Cool slightly and cut into bars while still warm.