Friday, May 6, 2011

Family, Fun, and Crabs

For 17 years now I have had the honor of attending The Husband's family crab feast in Astoria, Oregon.  Astoria holds a Crab Festival each year on the last weekend of April, which coincides with my father-in-law's birthday so the family celebrates both with a wonderful gathering.  Though the crowds have gotten somewhat smaller over the years, an air of festivity still abounds.
The main components of the day haven't changed much over the years.  Crabs are ordered through a local seafood shop and we pick them up, one per person, all cooked, cleaned, and ready for eating.  Food preparations start by boiling eggs, making dips, preparing the garlic breads, putting out relish trays, and making a big huge green salad with all the trimmings. The table is set including nut crackers and picks for all and we are ready for the big dinner.
Everyone has their own methods for how they eat their crabs.  There are the folks who like to pick and eat as they go and then there are the others (the patient ones) who prefer to pick all their crab meat into a nice tidy pile before eating.  I, if you hadn't picked up on it already, am of the latter category.  I learned after my first year to never leave your bowl of cracked crab unattended because there are those in the first category who have eaten all of their crab and will try to "borrow" some from their neighbors.
Some people come prepared for the meal with their own accessories, such as the wrist bands noted in the photo below which are used to soak up the crab juices that inevitably run down the arms.  It is a messy job with crab shells flying and more often then not, a sharp jab from a shell into a finger or two.  It's all worth it in the end though.

It is so comforting to have family traditions, no matter how big or small, to look forward to and participate in and I feel so lucky to be a part of this one every year.

A bonus photo taken on the following Sunday morning very early in Seaside, Oregon where the weather was absolutely perfect and the water was like a mirror.


Monday, May 2, 2011

Happy Third Anniversary Pie-O-My

Three years and 245 blogs later, I still look forward every week to trying a new recipe, taking photos, and writing a few words about my experiences in the kitchen.  What a fulfilling hobby this has turned out to be.  It has taught me how to be a much better cook, how to be more organized, the importance of how food looks as well as tastes, and developing a writing style that expresses my own voice.

Thank you to my loyal family and friends who have been, from the get go, so generous and kind in their words of support toward my little project.  A great big thanks to The Husband, who patiently waits for meals on the weekends as I style yet another plate, or take just one more photo, and who has been my guinea pig for more than a few failures!  You mean the world to me.

This blog has brought additional rewards in the form of a plug in a local newspaper, a mention in Bon Appetit Magazine for the chocolate-mint cookies pictured below, and many very generous food samples from outstanding companies throughout the country. These perks have been a totally unexpected bonus! I also receive a small monetary stipend each month for being a publisher with FoodBuzz. As The Husband likes to say regarding this extra income, "Don't quit your day job." 

Instead of cooking up something to celebrate the beginning of my fourth year of this blog, I thought I would go back in my photo archives and share a few of my favorite pictures with you. I look forward to continuing this blog for a long time to come.


Saturday, April 30, 2011

Time for a Vacation

I leave you to gaze upon one of the magnificent mountains here in beautiful Oregon, Mt. Hood.  This was taken last weekend as we were driving to Bend, via the Columbia Gorge route.  It really doesn't get much better than this for scenic splendor!  I'm out of the kitchen for next couple of weekends, so no cooking for me.

Friday, April 15, 2011

Cooking with Beer

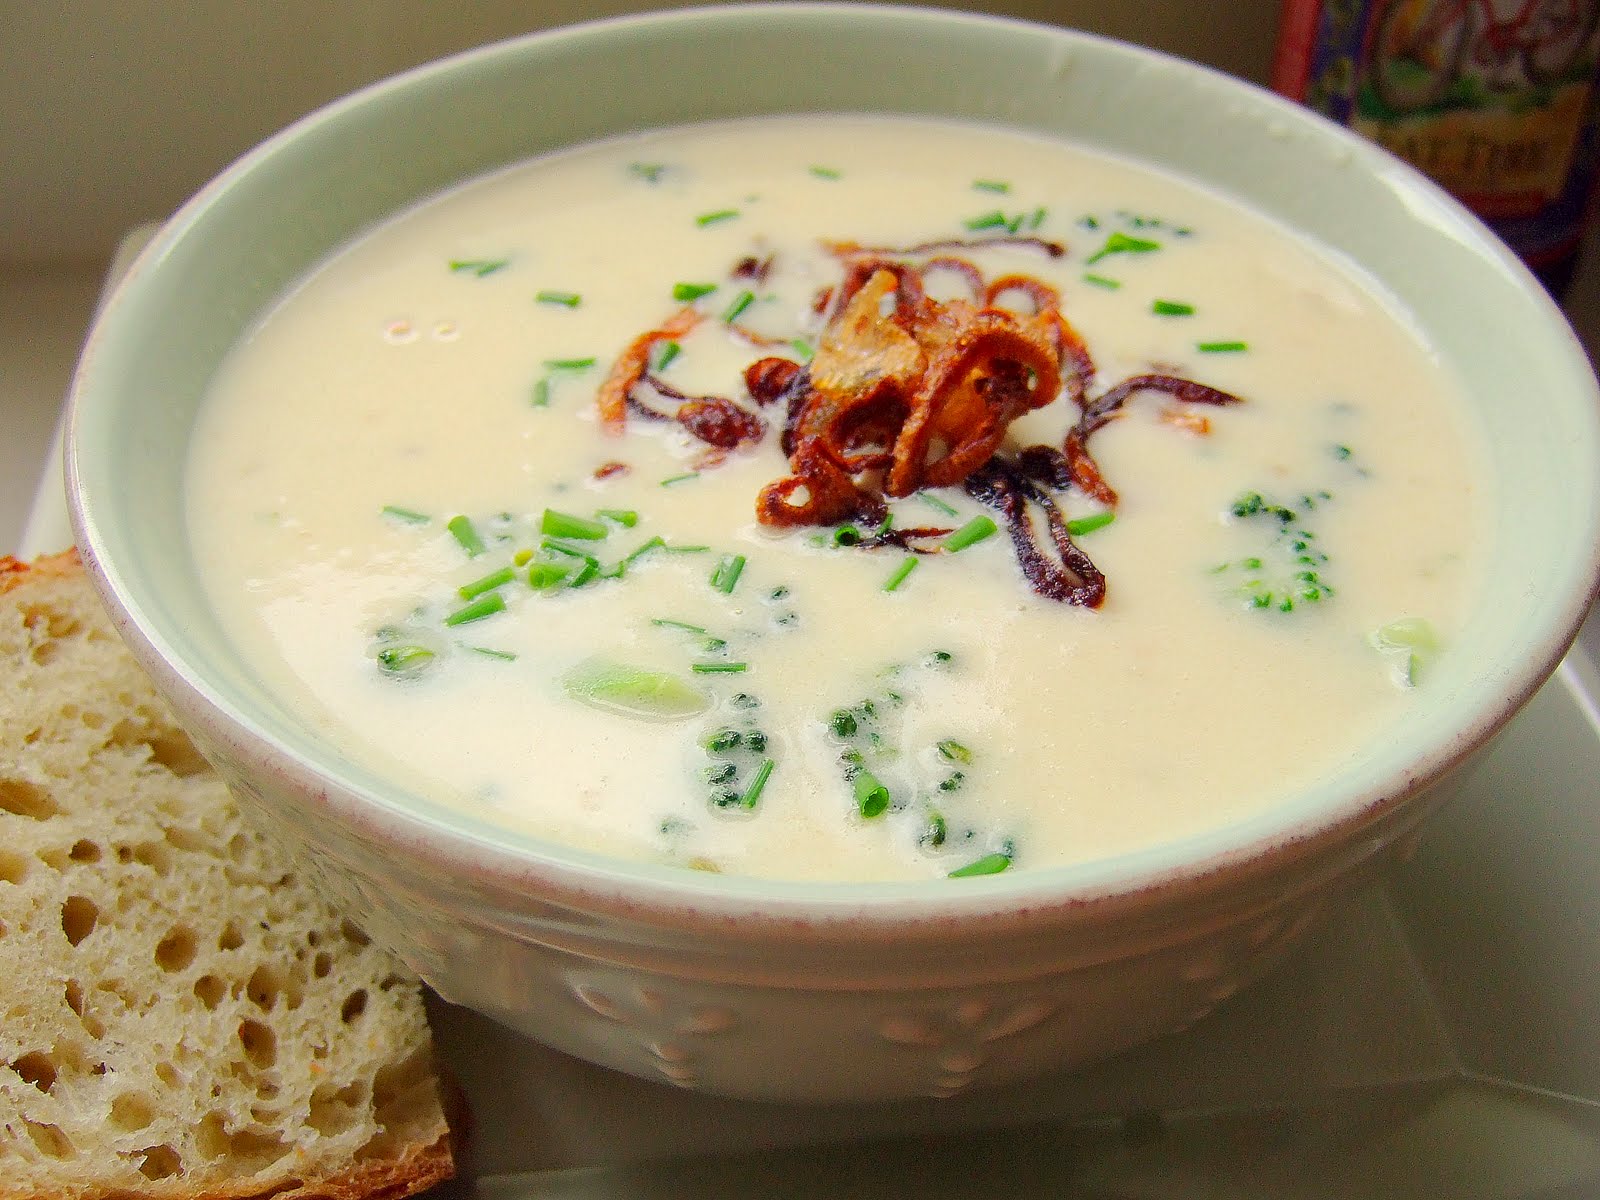
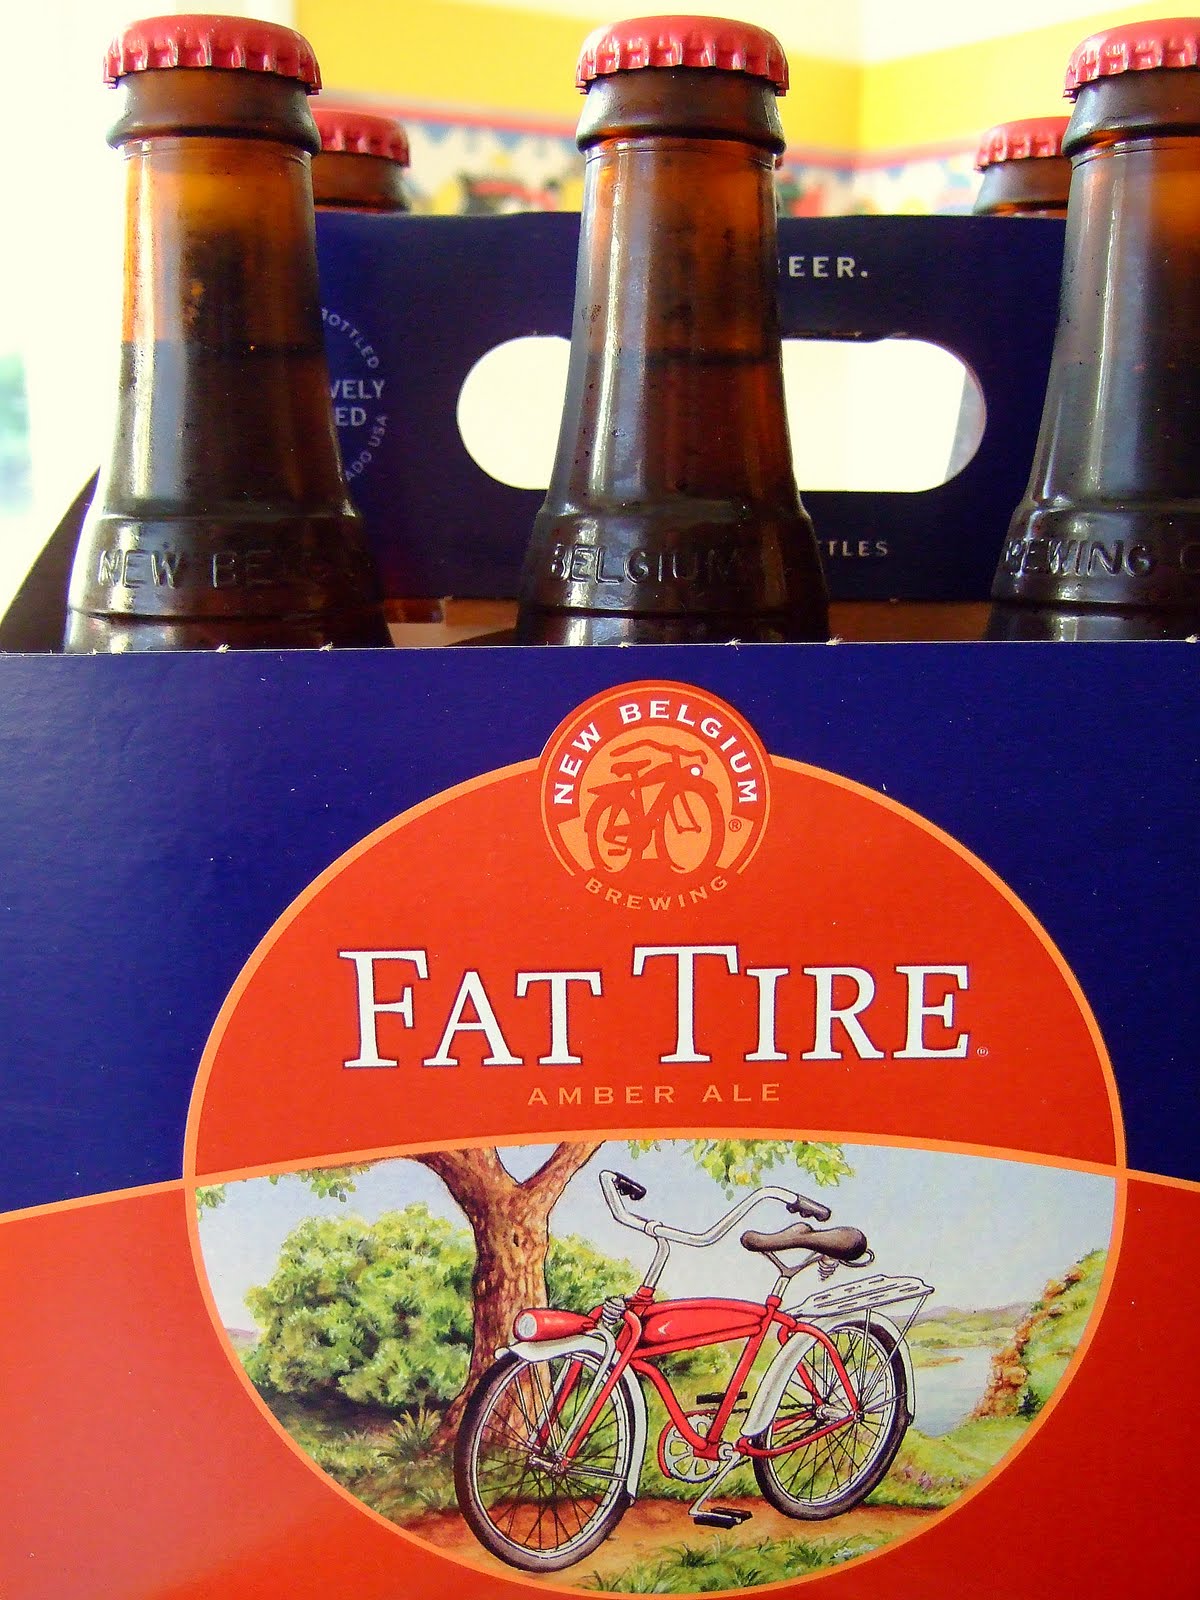
My challenge this weekend was to come up with a recipe using beer.  And not just any beer, but New Belgium Brewing Company brews.  I was recently the lucky recipient of a tidy stipend to try their products and I chose to buy some Fat Tire Amber Ale to cook with. I chose this particular beer based soley on the wonderful red bike on the six-pack. It's so darn fun!!  Tasting the beer by itself was delicious. I'm not a big beer fan, but this ale is just how I like it - a good malt flavor with the hops just ever so slightly coming through. A perfect beer by itself or served alongside you're favorite meal.

The two recipes I chose to make were a brand new creation and an old stand by. I made my never-fail and amazing no-knead bread which utilizes a small quantity of beer and I also devised a white cheddar cheese, beer, and broccoli soup.  For this soup I utilized a local cheese from the Willamette Valley Cheese Company.  I love their cheeses and try to buy them whenever I can.  They are so flavorful, particularly this Farmstead Cheddar and I like to buy locally made products whenever possible.
I'm not sure which dish accompanied which as they complimented each other so well.  The bread was so good dipped into the cheese soup. Almost like fondue only much thinner.  I garnished the soup with crisply sauteed and browned shallots which added a light carmelized onion flavor. 

Thanks so  much to the New Belgium Brewing Company for inspiring me to cook with beer. I will do it again very soon!

White Cheddar Cheese Beer Soup

1/2 c. flour
1/3 c. butter
1 garlic clove, pressed
1 tbsp. grated shallot
1 tsp. Worcestershire sauce
1/2 tsp. salt
1/2 tsp. dry mustard
1/8 tsp. white pepper
3 c. chicken broth
1 1/2 c. half & half
1 c. beer
2 cups of broccoli flowerettes, steamed
16 oz. shredded sharp white Cheddar

In large saucepan melt butter; stir in flour. Cook 1 minute, stirring constantly, until smooth and bubbly. Add garlic, onion, Worcestershire sauce, salt, mustard and pepper; blend well.

Gradually stir in chicken broth, half & half and beer; cook until thickened, stirring constantly. Add cheese, stir until melted. Add the broccoli. Heat gently, stirring frequently; do not boil. Serve with croutons and/or crusty bread. Makes seven (1 cup) servings. 

As part of the Foodbuzz Tastemaker Program, I received a stipend to purchase products from the New Belgium Brewing Company.

Friday, April 8, 2011

Cream Puffs

It's Spring in the Willamette Valley in Oregon. That means unsettled weather. One moment there are beautiful blue skies above and then within minutes, from the west come big, dark rain clouds that burst open in a torrent.  But there are also the white, fluffy, multishaped cumulonimbus clouds that remind me of cream puffs. (Without thick, rich chocolate sauce dripping from them.)
Cream puffs are so easy to make and when served with some whipped cream and chocolate sauce dripping down to the plate, you've got yourself an elegant end to any meal. Give them a try sometime for a special treat.

Cream Puffs

1/2 cup all purpose flour
1/2 teaspoon granulated white sugar
1/4 teaspoon salt
1/4 cup (4 tablespoons) unsalted butter
1/2 cup water
2 large eggs, lightly beaten

Preheat oven to 400 degrees F. and place rack in center of oven. Line a baking sheet with parchment paper.

In a bowl sift together the flour, sugar and salt. Set aside.

Place the butter and water in a heavy saucepan over medium heat and bring to a boil. Remove from heat and, with a wooden spoon or spatula, quickly add the flour mixture. Return to heat and stir constantly until the dough comes away from the sides of the pan and forms a thick smooth ball (about a minute or two). Transfer the dough to your electric mixer, or with a hand mixer, and beat on low speed a minute or two to release the steam from the dough. Once the dough is lukewarm start adding the lightly beaten eggs and continue to mix until you have a smooth thick paste. Spoon or pipe 6 mounds of dough onto the baking sheet, spacing them a couple of inches apart. Beat together the egg and salt for the glaze. With a pastry brush, gently brush the glaze on the tops of the dough.
Bake for 15 minutes and then reduce the oven temperature to 350 degrees F. Bake for a further 30 to 40 minutes or until the shells are a nice amber color and when split, are dry inside. Turn the oven off and, with the oven door slightly ajar, let the shells dry out for a further 10 - 15 minutes. Remove from oven and let cool on a wire rack.
To serve, slice open cream puff. Spoon in some whipped cream and pour over your favorite chocolate sauce. Serve immediately.

Saturday, April 2, 2011

A Spring Break

I don't really get a Spring Break but I am taking a break from the kitchen this week.  Just because.  Instead, I will share some pictures I took of some boats. And the remnants of an old cannery. I like boats. I grew up in a town surrounded by water, and boats. Big huge aircraft carriers, fancy yachts, speedboats, row boats.....you get the picture.  Now for some pictures from Astoria, Oregon one foggy morning a few months ago.


Saturday, March 26, 2011

Snickerdoodles

Here is a wonderful, old fashioned and easy cookie to whip together on a Saturday.  This recipe is adapted from Martha Stewart's Cookie Cookbook.  My adaptation is to add 1 teaspoon of vanilla as I think it is essential in almost any baked good, particularly cookies.

A couple of these, served with a cup of hot black tea and I'm a happy girl. Enjoy!

Snickerdoodles

2 3/4 cups all-purpose flour
2 teaspoons cream of tartar
1 teaspoon baking soda
1/4 teaspoon salt
8 tablespoons (1 stick) unsalted butter
1/2 cup pure vegetable shortening
1 3/4 cups sugar, plus more if needed
2 tablespoons ground cinnamon, plus more if needed
2 large eggs
1 teaspoon pure vanilla extract

Preheat the oven to 400 degrees, with one rack in top third and one rack in bottom third of oven. Line baking sheets with Silpat baking mats or parchment paper; set aside.


Sift together flour, cream of tartar, baking soda, and salt; set aside. In the bowl of an electric mixer fitted with a paddle attachment, combine butter, shortening, and 1 1/2 cups sugar. Beat on medium speed until light and fluffy, about 2 minutes. Scrape down sides of bowl. Add eggs, and beat to combine. Add dry ingredients, and beat to combine.

In a small bowl, combine remaining 1/4 cup sugar and the ground cinnamon. Use a small (1 1/4-ounce) ice-cream scoop to form balls of the dough, and roll in cinnamon sugar. Place about 2 inches apart on the prepared baking sheets. Bake until the cookies are set in center and begin to crack (they will not brown), about 10 minutes, rotating the baking sheets after 5 minutes. Transfer the sheets to a wire rack to cool about 5 minutes before transferring the cookies to the rack. Store in an airtight container up to 1 week.

Friday, March 18, 2011

Naan Bread

As promised, here is the Naan bread which accompanied the Chicken Tikka Masala Indian dinner from last week.  This is a very simple recipe and quite fun to make. The results were spectacular. Give yourself time though as it does take awhile to get through the rising processes and then rolling out and cooking each piece of bread.  It's well worth the effort!

Naan Bread

1 (.25 ounce) package active dry yeast
1 cup warm water
1/4 cup white sugar
3 tablespoons milk
1 egg, beaten
2 teaspoons salt
4 1/2 cups bread flour
2 teaspoons minced garlic (optional)
1/4 cup butter, melted

1. In a large bowl, dissolve yeast in warm water. Let stand about 10 minutes, until frothy. Stir in sugar, milk, egg, salt, and enough flour to make a soft dough. Knead for 6 to 8 minutes on a lightly floured surface, or until smooth. Place dough in a well oiled bowl, cover with a damp cloth, and set aside to rise. Let it rise 1 hour, until the dough has doubled in volume.

2. Punch down dough, and knead in garlic. Pinch off small handfuls of dough about the size of a golf ball. Roll into balls, and place on a tray. Cover with a towel, and allow to rise until doubled in size, about 30 minutes.
3. During the second rising, preheat grill to high heat.
4. At grill side, roll one ball of dough out into a thin circle. Lightly oil grill. Place dough on grill, and cook for 2 to 3 minutes, or until puffy and lightly browned. Brush uncooked side with butter, and turn over. Brush cooked side with butter, and cook until browned, another 2 to 4 minutes. Remove from grill, and continue the process until all are cooked.  Cool on a wire rack.  Makes approximately 14.

Saturday, March 12, 2011

The Mysterious World of Indian Cuisine

I've finally dipped my toe in the vast cuisine of India.  India has always been a place of great interest to me, but it's based on just a few things.  In 1984 I watched the most wonderful Masterpiece Theater series called the Jewel in the Crown and that began my initial intrigue of the place.  Since then I have read the 4 books it was based on by Paul Scott, subtitled The Raj Quartet.  I always watched the Travel Channel whenever anyone goes there, but particularly enjoy Anthony Bourdain's No Reservations series when he has traveled around the subcontinent.  I enjoy watching him go anywhere though!

As far as Indian food, I have had a very limited tasting.  Here in my town, we have only two Indian restaurants.  I use to go to one of them and particularly enjoyed their lunch buffets, for which I'm told Indian restaurants are known, until one memorable lunch.  It was my turn to choose where my co-workers and I should dine and I decided to take them to this place.  Now you should know that these particular co-workers were males of the most basic meat-and-potato eating crowd. The fact I could even get them in the door was somewhat of a miracle.  So there we were lined up at the steam tables when one of my co-workers in front of me delightfully pointed out a rather large cockroach crawling around the perimeter of the Tandoori Chicken tray.  Needless to say, I never heard the end of it about that lunch and I have never eaten Indian food again.  Until today.

I so enjoyed the spices and exotic flavors of the limited dishes I have tried so I decided I should give it a try at home.  My menu for this Indian feast included: Chicken Tikka Masala, Naan bread, Basmati Rice with slivered almonds and cucumber wedges.  To end our southeast Asian feast, we had a cool and refreshing lemon sorbet.

I will post today the recipe for Chicken Tikka Masala and will tell you about the Naan bread in the next post. The house was filled with heady aromas and it was a rich, lovely sauce coating the yogurt marinated chicken. Just as I remember it tasting, minus the cockroaches crawling around!

Chicken Tikka Masala

Chicken Tikka

1/2 teaspoon ground cumin
1/2 teaspoon ground coriander
1/4 teaspoon cayenne pepper
1 teaspoon table salt
2 pounds boneless, skinless chicken breasts , trimmed of fat
1 cup plain whole-milk yogurt or a fat free plain greek yogurt
1 tablespoons vegetable oil
2 medium garlic cloves , minced
1 tablespoon grated fresh ginger
Masala Sauce
2 - 3 tablespoons vegetable oil
1 medium onion , diced fine
2 medium garlic cloves , minced
2 teaspoons grated fresh ginger
1 fresh serrano or jalepeno chile , ribs and seeds removed, flesh minced
1 tablespoon tomato paste
1 tablespoon plus 2 teaspoons garam masala
1 (28-ounce) can crushed tomatoes
2 teaspoons sugar
1/2 teaspoon table salt
2/3 cup heavy cream
1/4 cup chopped fresh cilantro leaves (Optional for cilantro haters, or use parsley)

For the chicken, combine cumin, coriander, cayenne, and salt in small bowl. Sprinkle both sides of chicken with spice mixture, pressing gently so mixture adheres. Place chicken on plate, cover with plastic wrap, and refrigerate for 30 to 60 minutes.
In large bowl, whisk together yogurt, oil, garlic, and ginger; set aside.

For the sauce, heat oil in large Dutch oven over medium heat until shimmering. Add onion and cook, stirring frequently, until light golden, 8 to 10 minutes. Add garlic, ginger, chile, tomato paste, and garam masala; cook, stirring frequently, until fragrant, about 3 minutes. Add crushed tomatoes, sugar, and salt; bring to boil. Reduce heat to medium-low, cover, and simmer for 15 minutes, stirring occasionally. Stir in cream and return to simmer. Remove pan from heat and cover to keep warm.
While sauce simmers, adjust oven rack to upper-middle position (about 6 inches from heating element) and heat broiler. Cover chicken with yogurt mixture thickly and arrange on wire rack set in foil-lined rimmed baking sheet or broiler pan. Discard excess yogurt mixture. Broil chicken until thickest parts register 160 degrees on instant-read thermometer and exterior is lightly charred in spots, 10 to 18 minutes, flipping chicken halfway through cooking.
Let chicken rest 5 minutes, then cut into 1-inch chunks and stir into warm sauce (do not simmer chicken in sauce). Stir in cilantro if using, adjust seasoning with salt, and serve with basmati rice and Naan bread. Serves  6.

Saturday, March 5, 2011

Hummus, Oh Yes!

I love, love, love hummus. Unfortunately, The Husband-not so much. That didn't come out right. I love, love, love The Husband. He doesn't love, love, love hummus.  Oh this is getting confusing.

The point is, I don't make it very often when I'm the only one eating it. We do both enjoy pita chips and a big bag was purchased this weekend so I felt the need to whip up a batch of that creamy, garlicky, Middle Eastern favorite.  It is traditionally made with garbanzo beans, also called chick peas.  Another vital ingredient is tahini, a sesame seed paste.  The tahini I had, but not the chick peas.  I said to myself, "Self, why wouldn't cannelloni beans work just as well."  And you know what?  They did!  So here is my tried and true hummus recipe which I gladly share with you.

Hummus

3 Tbsp fresh lemon juice
1/4 cup water
6 Tbsp tahini, stirred well
3 Tbsp extra-virgin olive oil, plus extra for drizzling over the top of desired
1 14 oz. can chickpeas (or cannelloni beans), drained and rinsed
1-2 garlic cloves, minced
1/2 tsp salt
3/4 tsp ground cumin
1/8 tsp cayenne pepper (or to taste)

Combine all of the ingredients except for the olive oil together in a food processor, fitted with a steel blade.  Process until mixture is smooth.  Through pouring hole, slowly drizzle olive oil, pulsing until mixture is thoroughly combined.  Put in serving bowl, drizzle olive oil on top and sprinkle with paprika.  Serve with pita chips.